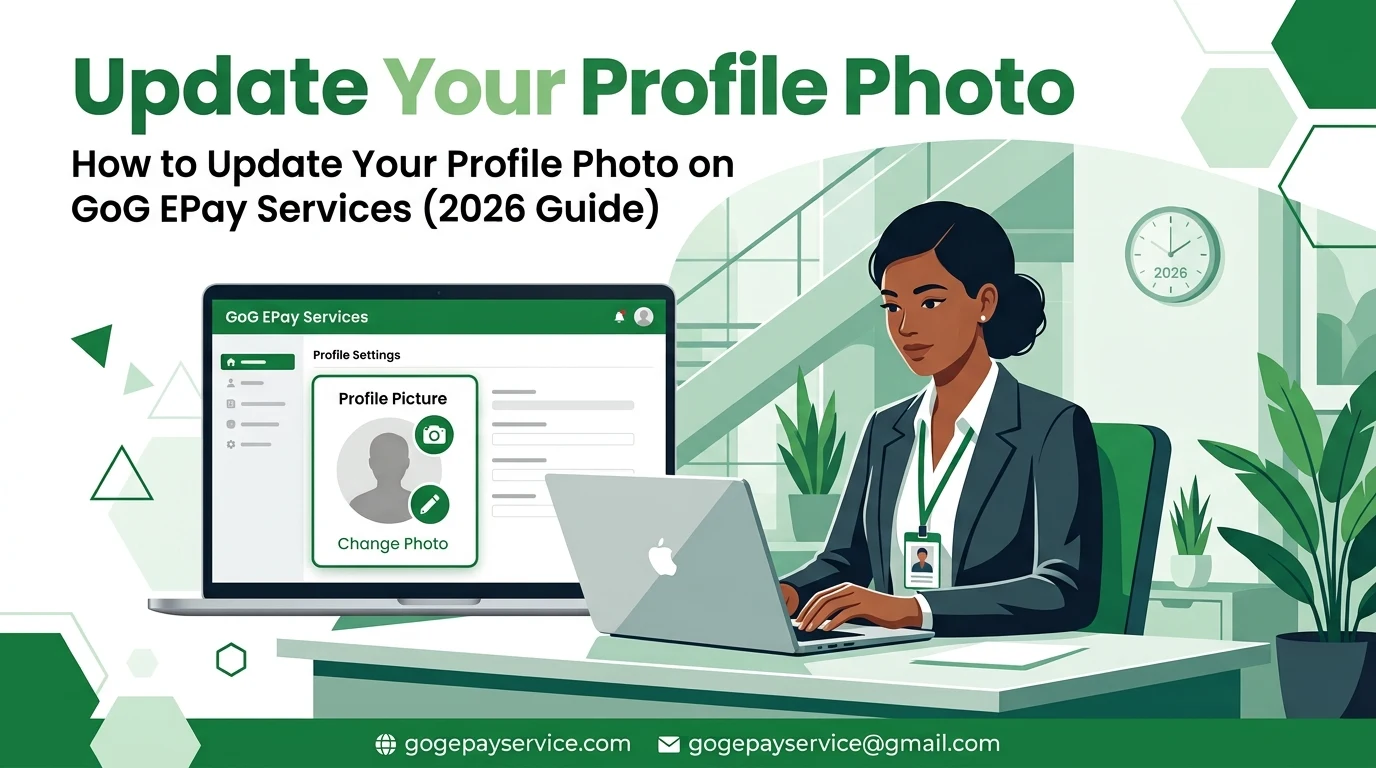
How to Upload or Update Your Profile Photo on GoG ePay Services
Is your profile photo on GoG ePay Services outdated or no longer a good representation of you? Keeping your profile picture updated helps colleagues and administrators recognize you easily and maintains a professional appearance on the platform.
Updating your profile photo on ePayslip Portal can improve account identification, help prevent confusion with other employees, and ensure your personal information remains accurate across the Gogepayservices portal. This guide explains the step by step process to change your profile photo quickly and successfully.
Why You Should Keep Your Profile Photo Updated?
A lot of employees skip the gogepayservices profile photo or leave an old one for years. Here’s why you should update your photo:
ePayslip Profile Photo Requirements
GOG Pay Services portal won’t accept just any image. Before you dig through your camera roll, make sure your photo:
Before uploading your profile photo, make sure:
Checking these requirements before uploading can help you avoid errors and complete the update successfully.
Steps To Update Your Profile Photo
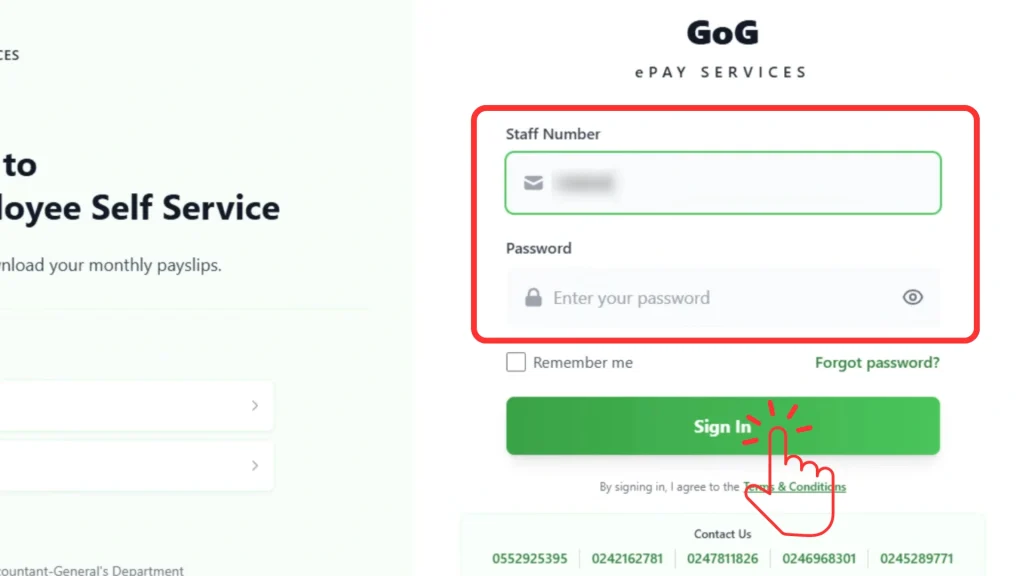
Step 1: Sign In
Open GOG Pay Services in your browser and login ePayslip portal with your employee credentials. Once you’re in, you’ll land on your dashboard.
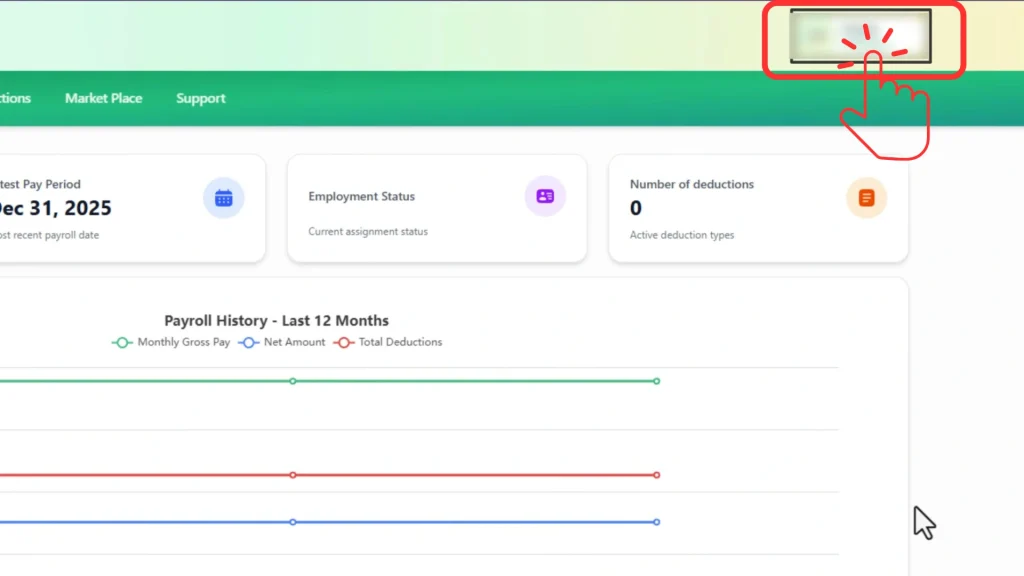
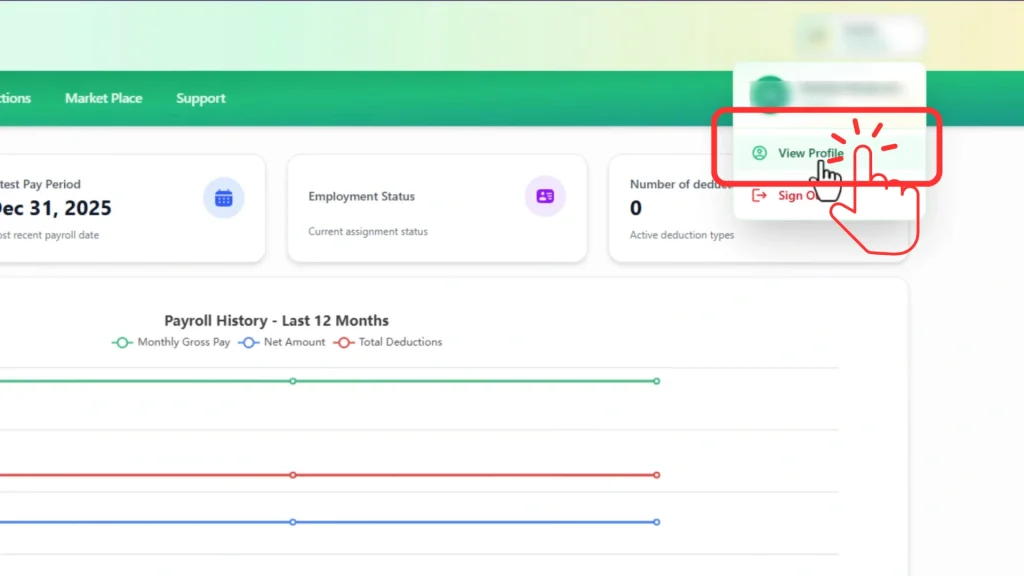
Step 2: Click the Profile Pill (Top Right)
Look at the top right corner of the screen. That small element showing your name or initials is the profile pill. Click it and a dropdown menu appears.
Step 3: Select “View Profile”
From the dropdown, click “View Profile.” This takes you to your profile page where your photo lives.
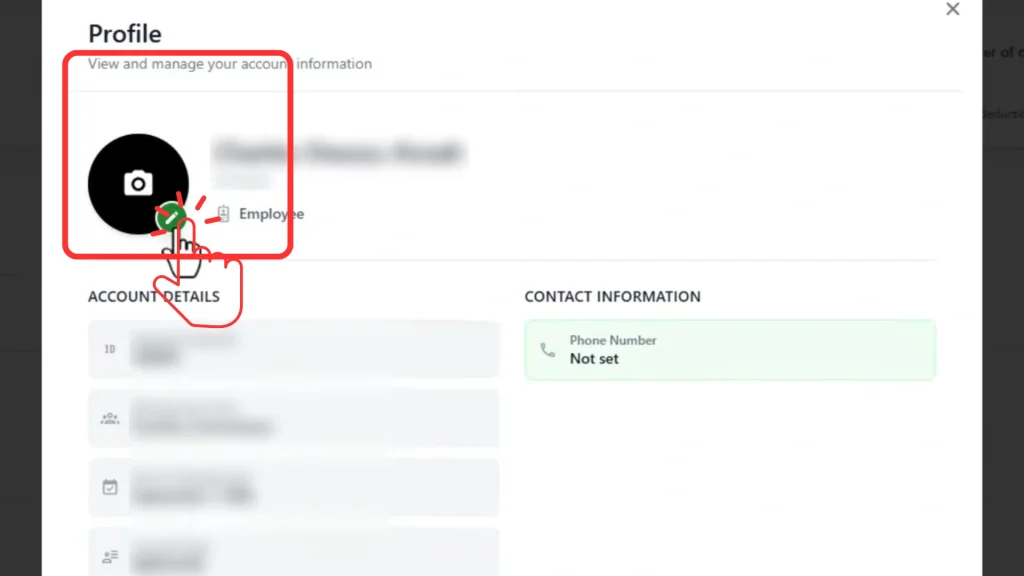
Step 4: Click the Pencil Icon
On your profile page, find the pencil icon near your photo. Click it. That opens the photo upload options.
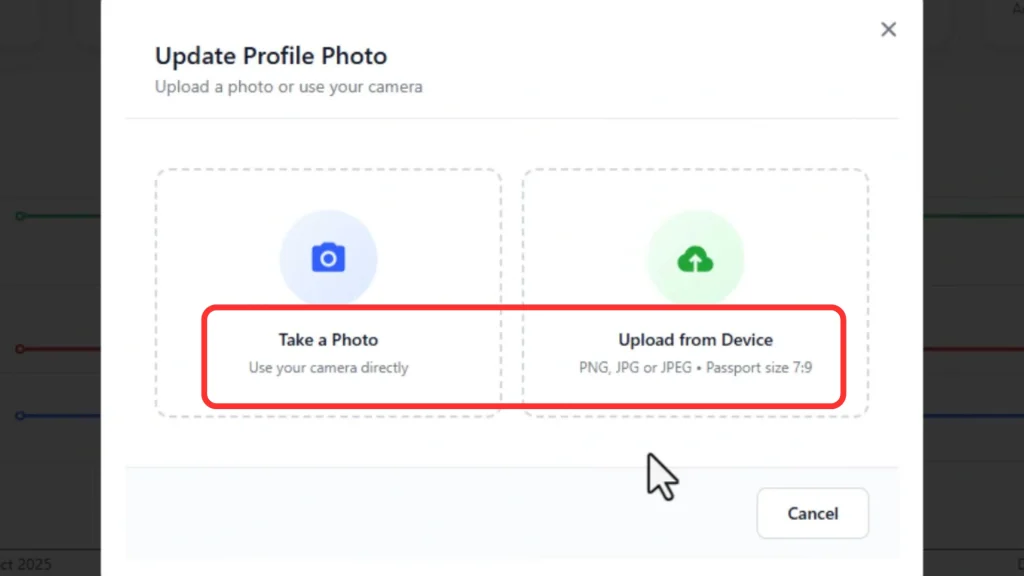
Step 5: Check the Photo Requirements Again
The platform shows you the specific requirements at this stage. Take 30 seconds to read them. File format, size limit, background rules, all of it is listed here.
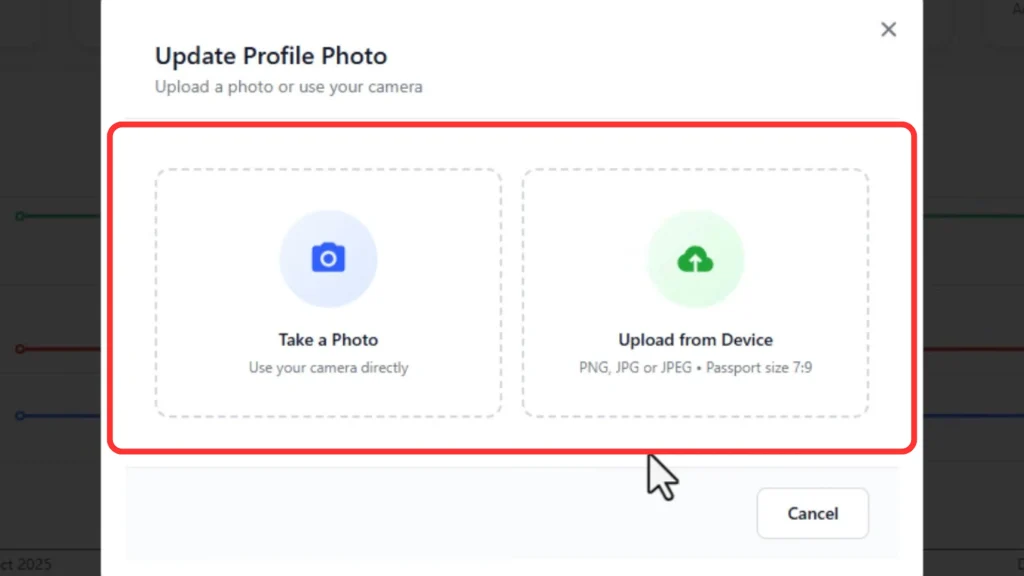
Step 6: Upload or Take a Photo
You have two choices:
Pick whichever works for you.
Step 7: Crop and Adjust
After you select a photo, a cropping tool appears. Use it to center your face inside the frame. Make sure the photo isn’t too dark, too blurry, or cut off at an awkward spot.
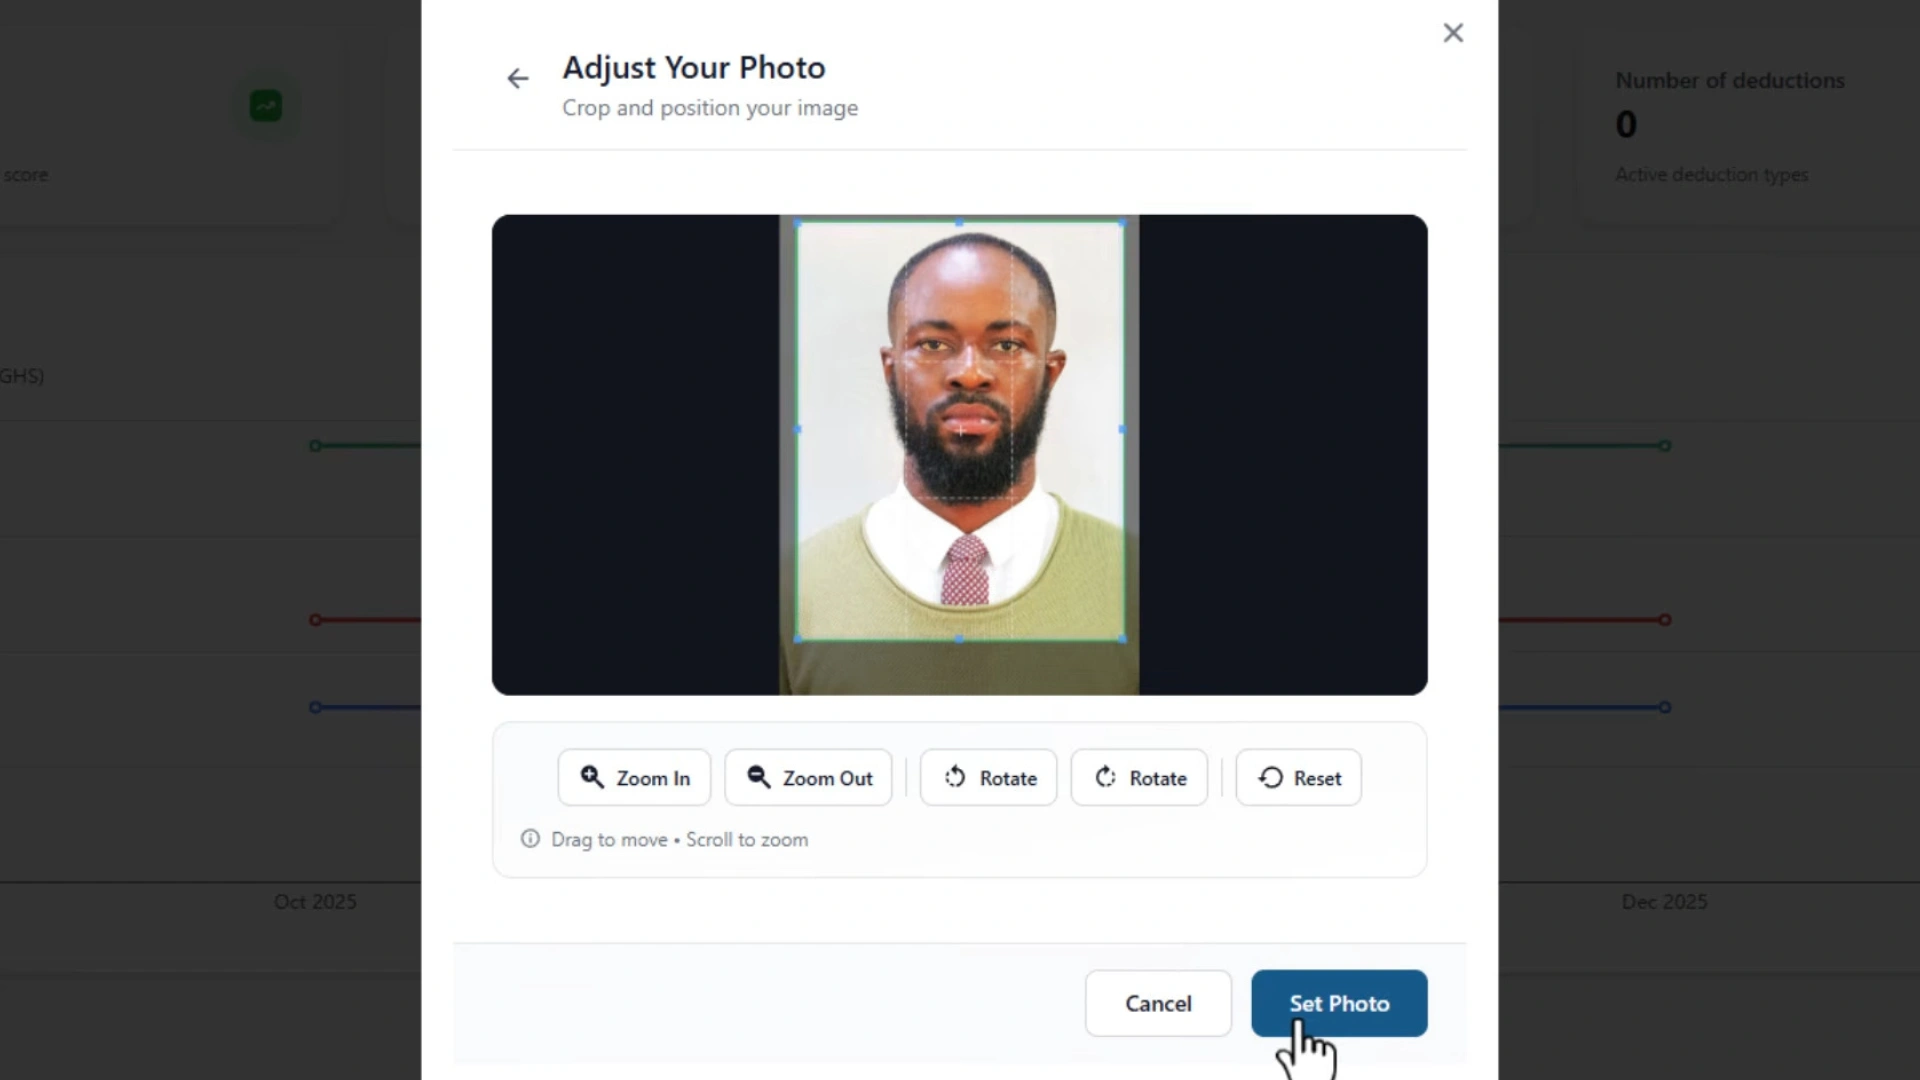
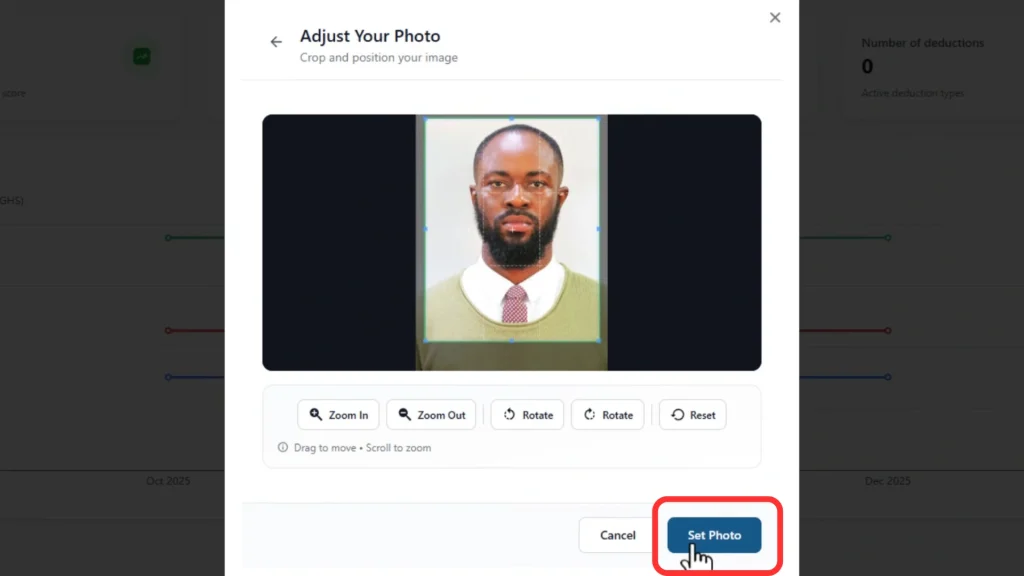
Step 8: Click “Set Photo”
Happy with how it looks? Click “Set Photo” to lock in your selection before saving.
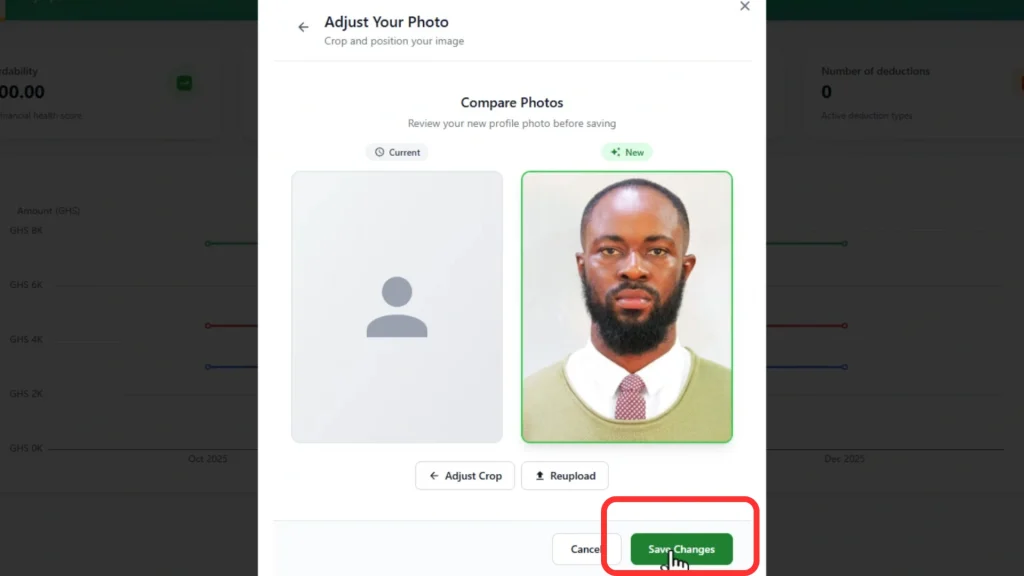
Step 9: Review and Save
A final preview loads. Look it over one more time, then click “Save.” That’s it. Your new profile photo is live.
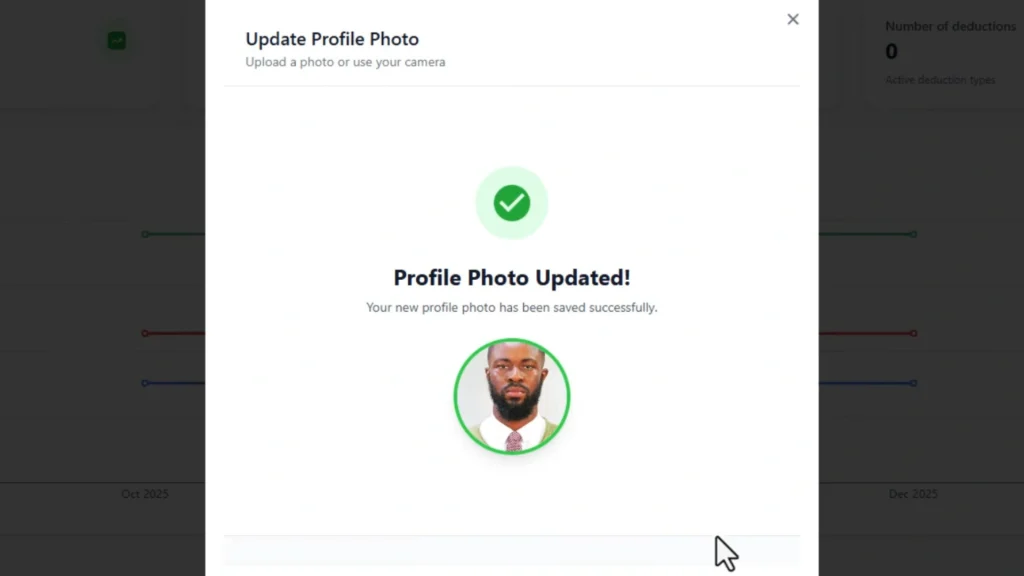
Step 10: Photo Updated Successfully
Congratulations! Your new profile photo has been updated successfully. The image will now appear on your profile and across supported areas of the portal where your account information is displayed.
Watch the official video tutorial to learn how to update your profile photo on the Employee Self Service portal. Follow the step by step instructions to upload and save your new profile picture.
Source: Official CAGD YouTube Channel.
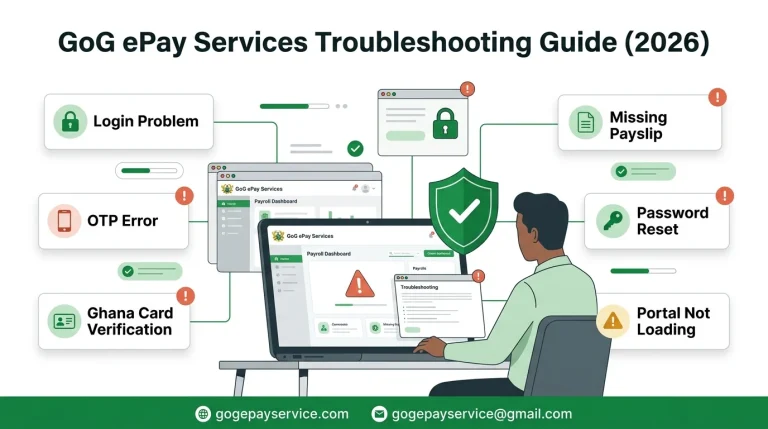
Common Problems and Solutions
If you have trouble updating your profile photo, try these quick fixes:
Problem | Solution |
Photo won’t upload | Make sure the image is in the correct format and within the file size limit. |
Edit photo icon is missing | Refresh the page and sign in again. |
Photo looks blurry | Upload a clearer, higher-quality image. |
Changes are not saving | Check your internet connection and try again. |
Error message appears during upload | Use a different image or reduce the file size before uploading. |
GoG ePay Services Help Center
If you are unable to update your profile photo or experience any account related issues, you can contact the GoG ePay Services support team for assistance. The helpdesk can guide you with registration profile updates, login problems, account verification, and other portal related concerns.
You can reach the Gogepayservices portal support team through the following contact numbers:
Before contacting support, keep your employee number, full name, and other account details ready. This will help the support team assist you more quickly.
Conclusion
Keeping your profile photo up to date on GoG ePay Services helps maintain a professional profile and makes it easier for colleagues, managers, and administrators to recognize you. The process is simple and only takes a few minutes to complete.
By following the steps in this guide, you can upload a new photo, save your changes, and keep your account information current. If you experience any problems during the update process, review the solutions above or try again with a photo that meets the platform requirements.